Copyright
©The Author(s) 2015.
World J Gastroenterol. Jan 21, 2015; 21(3): 759-785
Published online Jan 21, 2015. doi: 10.3748/wjg.v21.i3.759
Published online Jan 21, 2015. doi: 10.3748/wjg.v21.i3.759
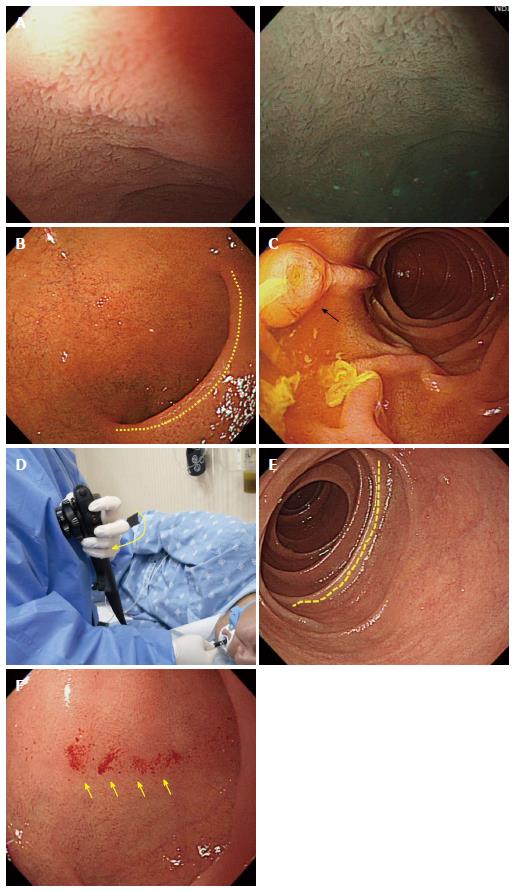
Figure 19 Insertion from duodenal bulb into the descending portion of duodenum.
A: Villi in the duodenal bulb. Water-filling method (left) and narrow-banding image (right); B: Typical image of a normal duodenal bulb. The superior duodenal angle in a crescent shape is observed on the right side. This direction coincides with the progression direction into the second portion of duodenum (descending part); C: Descending part of duodenum. The AOV is observed; D: Image of the left hand when inserting the scope into the descending part of duodenum from the duodenal bulb. It is advisable to pull the left hand holding the control part close to the chest (arrow mark), as it will help insert the scope into the descending part of duodenum. If one fails to advance the scope into the descending part of duodenum by rotating the shaft to the right in the SDA, it is recommendable to try to angle the scope more sharply to the right side or to do it in combination with an upward deflection of the distal tip of the endoscope; E: Circular fold (Kerckring) observed in the descending part of duodenum; F: Bleeding marks on the mucous membrane due to a collision with the endoscope during the advancement from the ampulla into the descending part of duodenum. A smooth insertion of the scope is needed in order to avoid leaving bleeding marks during the advancement into the entrance to the descending part of duodenum. However, if the body of an examinee moves during the endoscopy, even a skilled endoscopist can leave bleeding marks while trying to insert the scope into the descending part of duodenum. Therefore, it is recommended to film the images of the duodenal bulb before inserting the scope into the descending part from the duodenal bulb.
- Citation: Lee SH, Park YK, Cho SM, Kang JK, Lee DJ. Technical skills and training of upper gastrointestinal endoscopy for new beginners. World J Gastroenterol 2015; 21(3): 759-785
- URL: https://www.wjgnet.com/1007-9327/full/v21/i3/759.htm
- DOI: https://dx.doi.org/10.3748/wjg.v21.i3.759


