Copyright
©The Author(s) 2015.
World J Gastroenterol. Jan 21, 2015; 21(3): 759-785
Published online Jan 21, 2015. doi: 10.3748/wjg.v21.i3.759
Published online Jan 21, 2015. doi: 10.3748/wjg.v21.i3.759
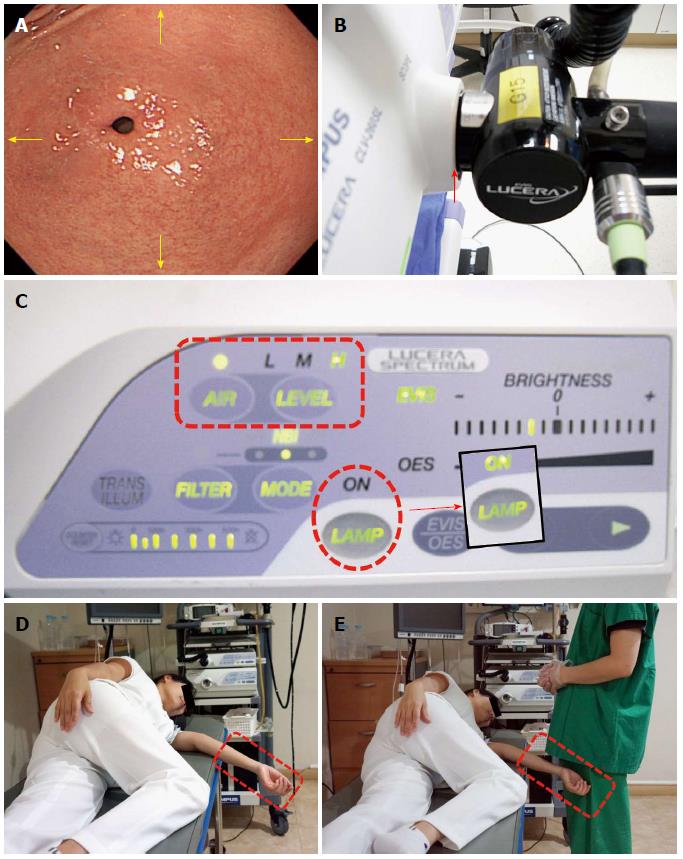
Figure 6 Pre-intubation preparation.
A: The endoscopic image displayed on the monitor. A beginner endoscopist must remember that the direction (arrow marks) on the screen coincides with that of the movement of the endoscope. Therefore, for example, if one wants to see a lesion on the upper side, one can angle the tip of the endoscope upward; if one wants to see a lesion on the lower side, one can angle it downward; if one wants to see a lesion on the left or right side, you can angle it to the left or right, respectively; B: Connection part where the endoscope is plugged into the mainframe. If there is any defect in the arrow-marked part, an endoscopist will encounter difficulty advancing the scope due to insufficient air insufflation; C: Mainframe. There are many buttons to control a variety of functions. Among them, the control button for air insufflation (dotted rectangle) is set to a low level for the colonoscopy, while the esophagogastroduodenoscopy is performed at a high level of air insufflation. Apart from them, there is the light source button (dotted circle). If the light source button turns off, an image on the screen becomes invisible, which makes it impossible to proceed with an endoscopy. Therefore, endoscopies must be always performed after checking whether the light source functions properly; D, E: Wrong position of arm. If an arm of an examinee is protruding out of the bed, it can touch the body of the endoscopist and interfere with the examination.
- Citation: Lee SH, Park YK, Cho SM, Kang JK, Lee DJ. Technical skills and training of upper gastrointestinal endoscopy for new beginners. World J Gastroenterol 2015; 21(3): 759-785
- URL: https://www.wjgnet.com/1007-9327/full/v21/i3/759.htm
- DOI: https://dx.doi.org/10.3748/wjg.v21.i3.759


